Google Docs is no doubt one of the best free alternatives for the infamous Microsoft Word. The software has seen some impressive upgrades and patches over the shorter 15 years of its lifetime. Even though the software is free, it comes with extensive support, which is definitely one of the factors responsible for its success. In this guide, we’ll answer a question repeatedly asked by many. We’ll show you how to rotate an image in Google Docs.

Must See:How to Swap Cells in Google Sheets
Google Docs is famous for many things, and one such thing is the ability to use it from a browser. If you’ve been using Google Docs for a while, you’d have already known that fact. Google seems to have used MS Office as a reference to design their own “office” suite, as these suites share quite a lot of similarities. Rotating an image also shares a similar procedure.
Steps to Rotate an Image in Google Docs
As always, start by logging creating a new document in Google Docs.
- Click on Go to Google Docs.
- Create a new document by clicking on Blank or from a wide variety of templates. You could also open any document you’ve been previously working on.
- Insert an image into the document by any of the following methods.
- Drag and drop a file directly or.
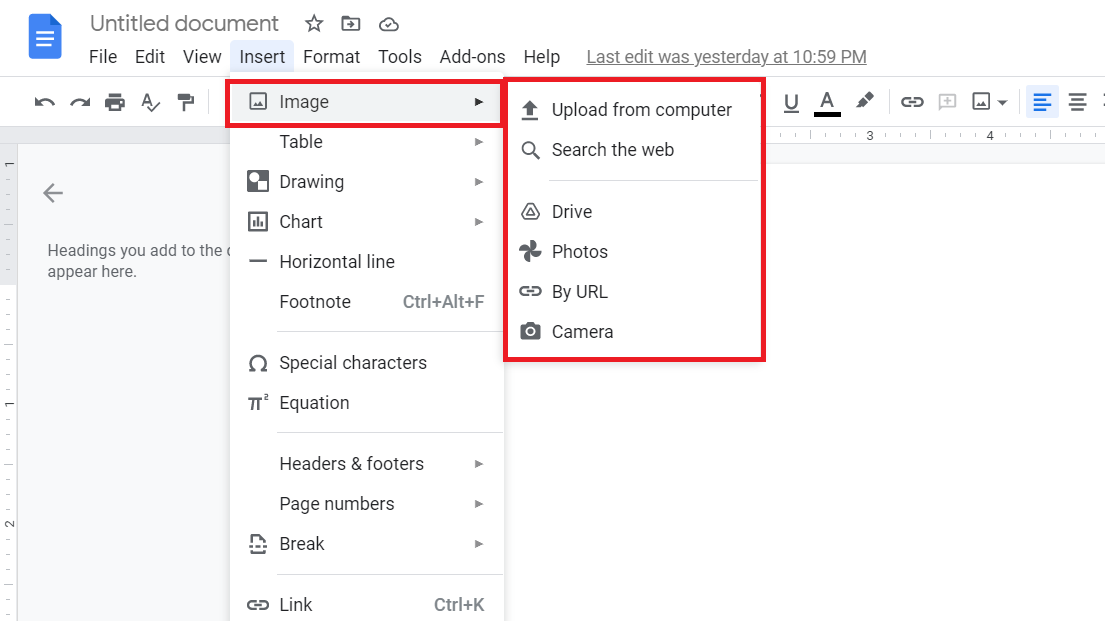
- Click on Insert > Image > Choose an option best suited for you.
 You could use this method to insert images from your Google Drive and Google Photos.
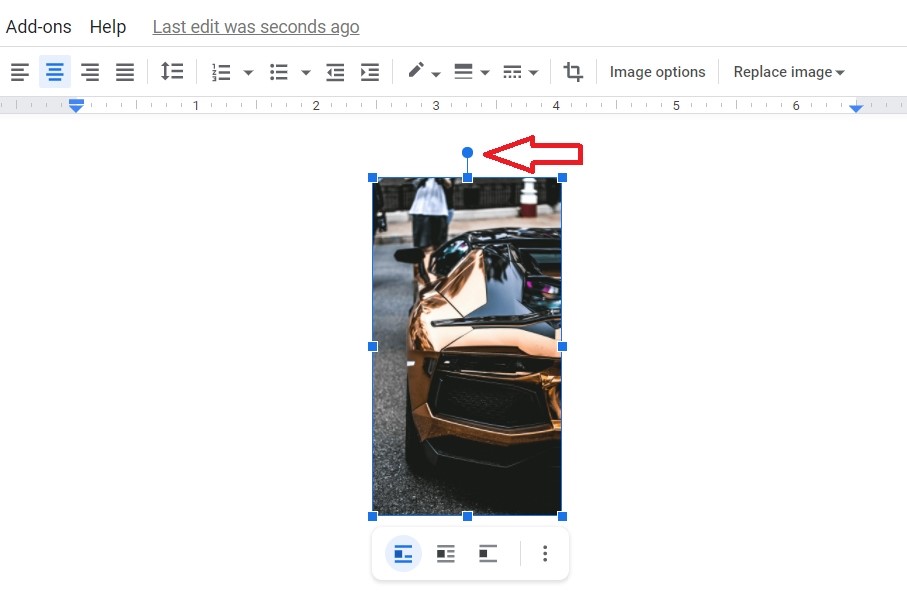
- The image will now appear on your document. Click on it to select it. A thin blue line with small square boxes on every corners and center of the edges indicate that the image is in selection.
The image must be selected before you rotate the image. We’ll need to click and hold on to that blue circle at the top of the image. Follow any of the methods to rotate the image.

Rotate an Image Smoothly
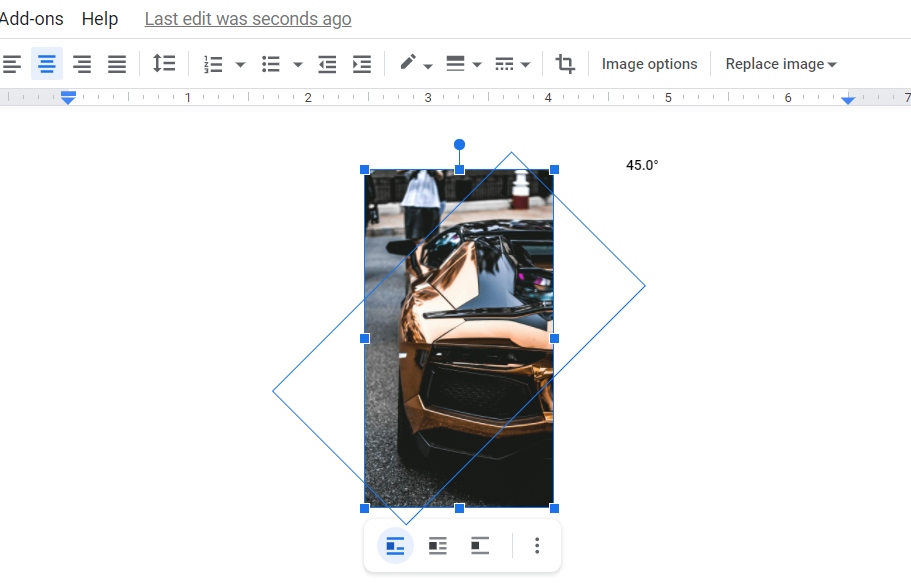
The image can be rotated smoothly by moving the mouse left or right while holding the blue circle. This would rotate the image with increments of 0.1°. This might be useful for users who need the smallest increments possible. Remember to let go of the mouse when you’ve reached the desired angle.
Rotate an Image in Steps
If you’re like us, you won’t be needing to rotate the image very smoothly. You can move the image in step increments of 15°. This is useful for achieving quicker and more commonly used angles like 30°, 45°, 60° or the most popular 90° and 180°.
This method only requires you to press and hold the Shift key on the keyboard while moving the mouse left or right. Remember to let go of the mouse when you’ve reached the desired angle.

Also Read: Google I/O Developer Conference 2021 will commence from May 18
Google Docs is an excellent tool for business and personal use. The frequent updates and UI changes will only make the tool better. We hope you found this guide helpful Reach us through the comments if you need any further information.
