
Chromebooks are great, but that doesn’t mean they’re perfect. Like any electronic gadget out there, these Chromebooks are also not free of overtime lagging or bugs. If you’ve been using one for quite a while now, you’d probably have a feeling that your device is not performing well. So if you’re feeling your Chromebook is behaving like Skynet, this guide will show you how to use the Chromebook Recovery Utility. That way, you’ll be able to restart things the way Jessie Pinkman did.
Related: How to use VirtualBox on Chromebook
It is not so difficult to troubleshoot a Chromebook, but there are times when the Chrome OS on your Chromebook might get corrupted. This will turn your Chromebook into nothing more than a luxurious paperweight. Google very well knows something like this could happen. So they’ve managed to squeeze in the Chromebook Recovery Utility to the Chrome OS. The tool will come in as a last measure to rescue your Chromebook. The Chromebook Recovery Utility is the AZ5 button for Chromebooks. So make sure there are no other solutions to your problem.
Use the Chromebook Recovery Utility
The tool will let you reinstall a fresh copy of ChromeOS on your Chromebook, similar to reinstalling Windows, macOS, or a Linux OS. We only recommend you use the tool only when the device is no more usable. But you must use the tool when you receive the Chrome OS is missing or damaged error.
Pre-requisites
You’ll need to meet the following pre-requisites to use the tool.
- A working Chromebook or a Windows/Mac device.
- If you’re not using a Chromebook, you need to install Google Chrome on your Windows/Mac machine.
- A working internet connection.
- A USB flash drive with at least 8 gigs of free space. Even though you could use an SD Card to get the job done, we won’t recommend you use one. SD Card slots are not as reliable as a USB port.
- Note that all data you had on your corrupted Chromebook will be deleted permanently. There is no way of recovering the data. So make sure to make periodic backups to reduce the chance of losing data in such a situation.
Download Chrome OS Recovery Utility
To start with, we’ll have to download the tool from the Chrome browser. To do that, follow these steps.
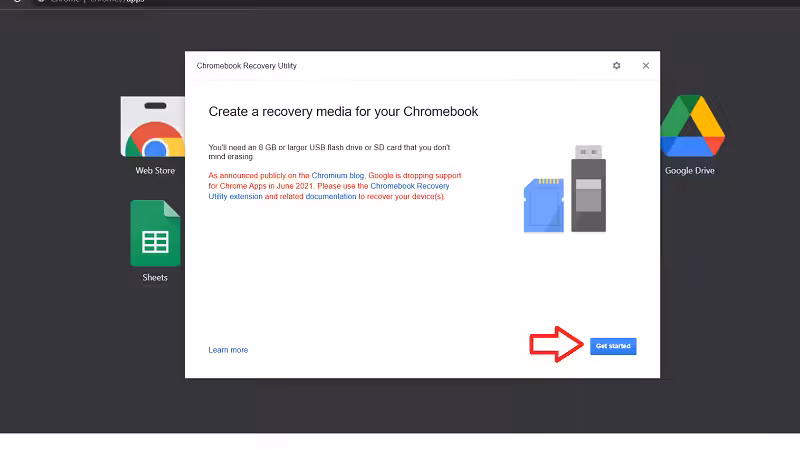
- Download and install the Chromebook Recovery Utility from the Chrome Web Store.
- Open the tool and click on Get Started.
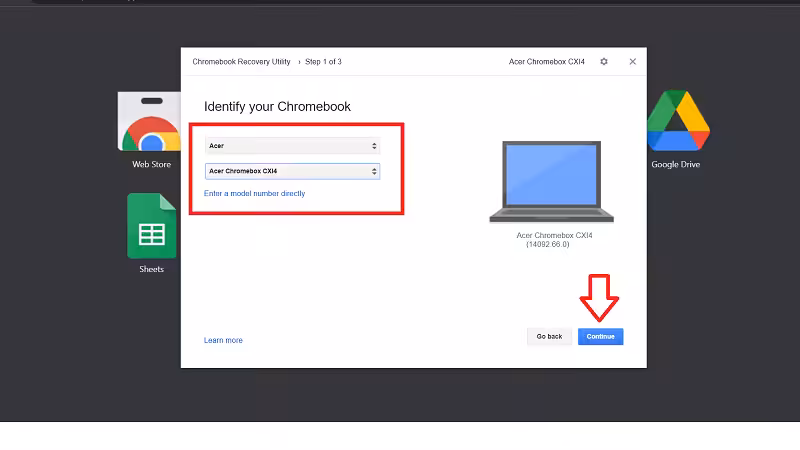
- Type in your Chromebook model number or click on Select a model from a list to choose your Chromebook. Before you click on Continue, make sure to connect the USB drive or the SD card to your device.
- Select the storage device from the next window and click on Continue.
- Click on Create now to copy the necessary files to recover your Chromebook.
- Safely eject the storage device once the process is complete.
Recover your Chromebook
This is much simpler than recovering a Windows/Mac machine.
- Make sure there are nothing connected to your Chromebook except for the power cable. Also, make sure your Chromebook is turned off.
- Press the Esc + Refresh + Power keys to enter Recovery Mode on your Chromebook. If you’re using a tablet, you can press the Volume Up + Volume Down + Power buttons to enter Recovery Mode.
- The device will display a message to indicate the OS is missing on your device. It will ask you to insert a Chromebook Recovery Utility USB flash drive or SD card to recover the device. Insert the USB drive or the SD card when you see the message.
- Follow the on-screen instructions to recover your Chromebook.
You can also recover some Chromebooks by using a paper clip to press a recovery button. The following brands were smart enough to include such an easy step.
- Acer AC700
- Asus Chromebit
- CR-48
- Samsung Series 5 and the Series 5 550
- Samsung Series 3 Chromebox
You can continue with the recovery after you see the message on the above Chromebooks.
Also Read: How to run Python code on Chromebook
The process will take a while, so sit back and enjoy. Once the process is complete, your Chromebook will restart automatically, and you’ll be greeted with a welcome screen. You can now set up your Chromebook as you would a new one. Again, the only data you’ll be able to recover are the ones you’ve already backed up.