
Google recently pushed some exciting changes to the Chrome browser version 115 and version 116. Apart from the visual changes, a lot has been changed at the backend. Among the changes, Chrome recently bundled the old Download bar and replaced it with the new Download Bubble. However, some users are upset with the recent advancements, especially the addition of the Download Tray. Well, the users can turn off Chrome’s new download Bubble by following the steps below.
Must See: Where is the Refresh Button on a Chromebook?
Google replaced the Download Bar with Bubble or Tray to improve the UX of Chrome. The old format was affecting the user experience and was taking up more space. It even looked primitive, meanwhile, the new Download Button hardly affects the UX. It lits up in blue color once the user starts downloading something. However, some users are more likely to use the Download Bar.
Here’s a fix that will help you get back the famous Download Bar. The tweak works on Windows, ChromeOS, and macOS operating systems without any issues.
Steps to Turn Off Chrome Download Tray
Chrome has several flags that allow users to get some functionality that is not directly available for the users. The same applies to the Download Tray which is even known with the name of Download Bubble. The user needs to toggle a flag:
- Open Chrome flags by heading to chrome://flags/#download-bubble.
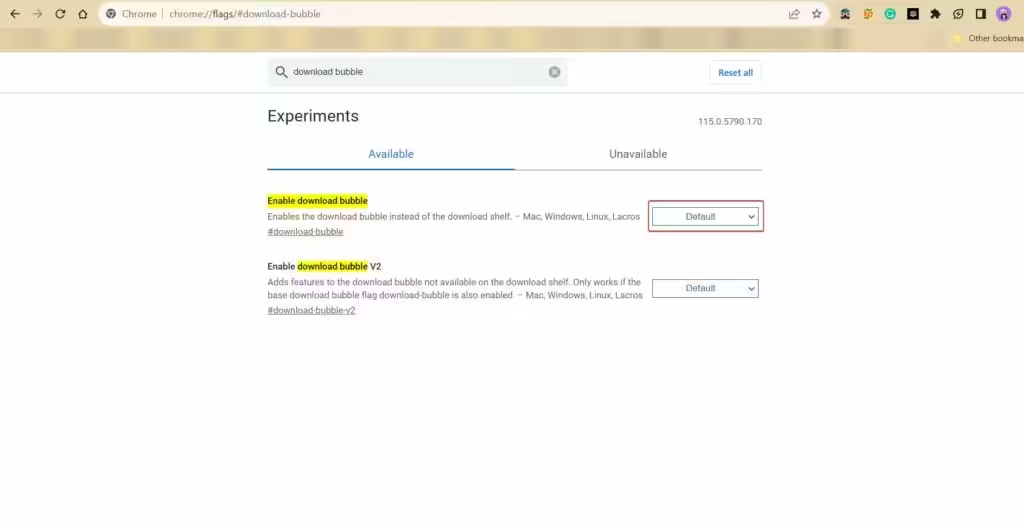
- The link will directly bring you to the Download Bubble Flag.
- The user should disable it to make Download Tray disappear.
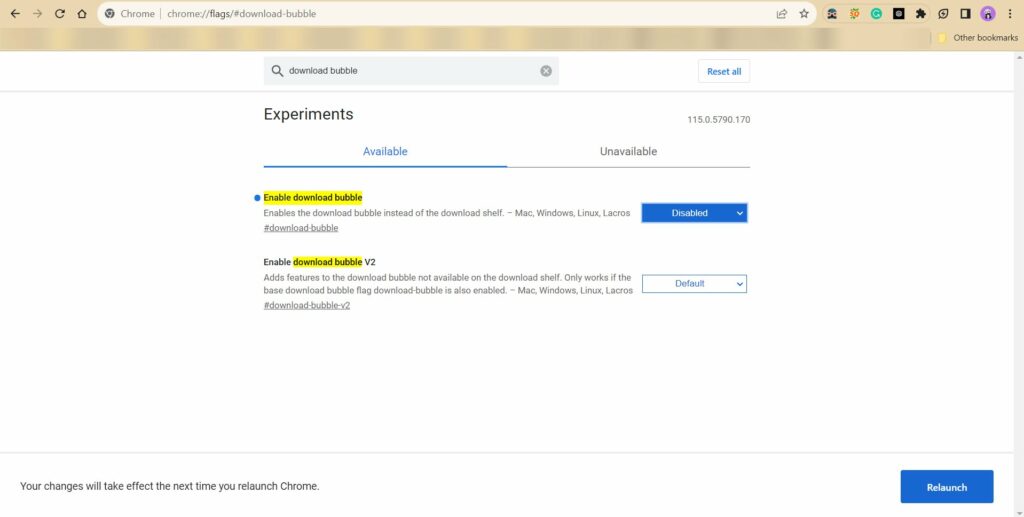
- Now, Relaunch Chrome to make it work.
The users will now see the Download Bar instead of the new Download Tray icon. We don’t know until which version the option to disable Download Tray will remain. However, till it is available, the user can easily get the old look back.
Related: How to Reset Google Chrome to Default Settings
In case the user has any issues while following the steps above, then do let us know via the comments below.