
Google’s Chromebook runs on Chrome OS based on the Linux kernel. However, the User Interface when you turn on the Chromebook is the default Browser Google Chrome and by opening it, the user can instantly start surfing or even play games that are available on Google’s Play store, etc. But if the user wants an alternative web browsing option, we are here to help. Mozilla Firefox is a good alternative to Chrome, and let’s see how to install Firefox on a Chromebook.
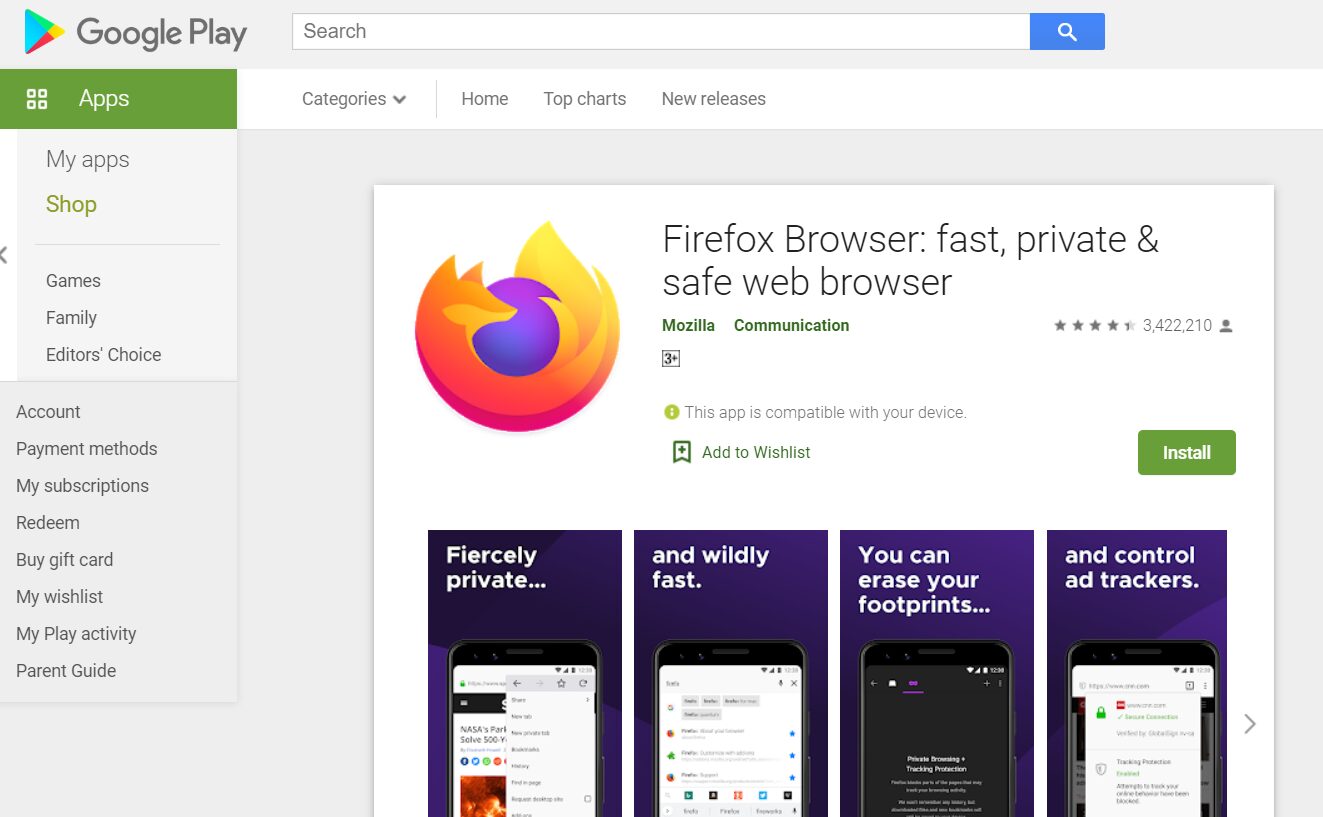
Installing Firefox from Google Play store:
Chromebook with a newer version of Chrome OS has the support of running Android apps out-of-the-box. To install Firefox from the Playstore do the following:
- Open Google’s Play Store on your Chromebook.
- Search for Mozilla Firefox and download it.
- You can install any of the versions of Firefox you want. Generally, there are three versions, namely Firefox standard edition, Firefox Focus, and Firefox preview.
- After downloading and installing, Firefox is ready to use.
Since the core UI of the app is based on mobile viewing, a better version of Firefox for desktop browsing experience is available. Follow one of the methods below.
Installing Firefox(ESR version) through the Linux Terminal
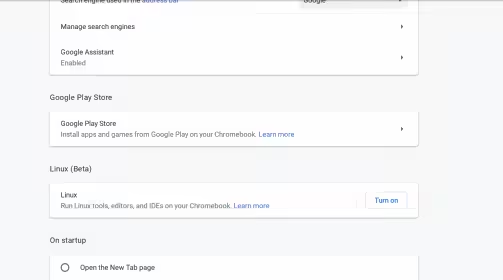
Chrome OS is based on the Linux kernel. However, only newer versions have been given access to the Linux Terminals to support apps that are compatible with Linux. Hence, you can install the desktop version of the app through the Linux terminal. To check if your Chromebook supports Linux apps,
- Open your Chromebook browser, and click on Settings in the Menu.
- Search for the keyword ‘Linux’.
- You will see an option with Linux(beta). Click on it to enable the Linux terminal.
This Linux beta is based on the open-source and frees called Debian GNU. Hence by enabling this, we can install various Linux-supported apps using the Linux terminal. Follow the steps.
- Open the Menu drawer on the bottom left and type Terminal.
- Since Firefox is available in the repository, we can type the following command to install it easily.
sudo apt install firefox-esr
3. After this, you can see the Firefox present in the dock list.
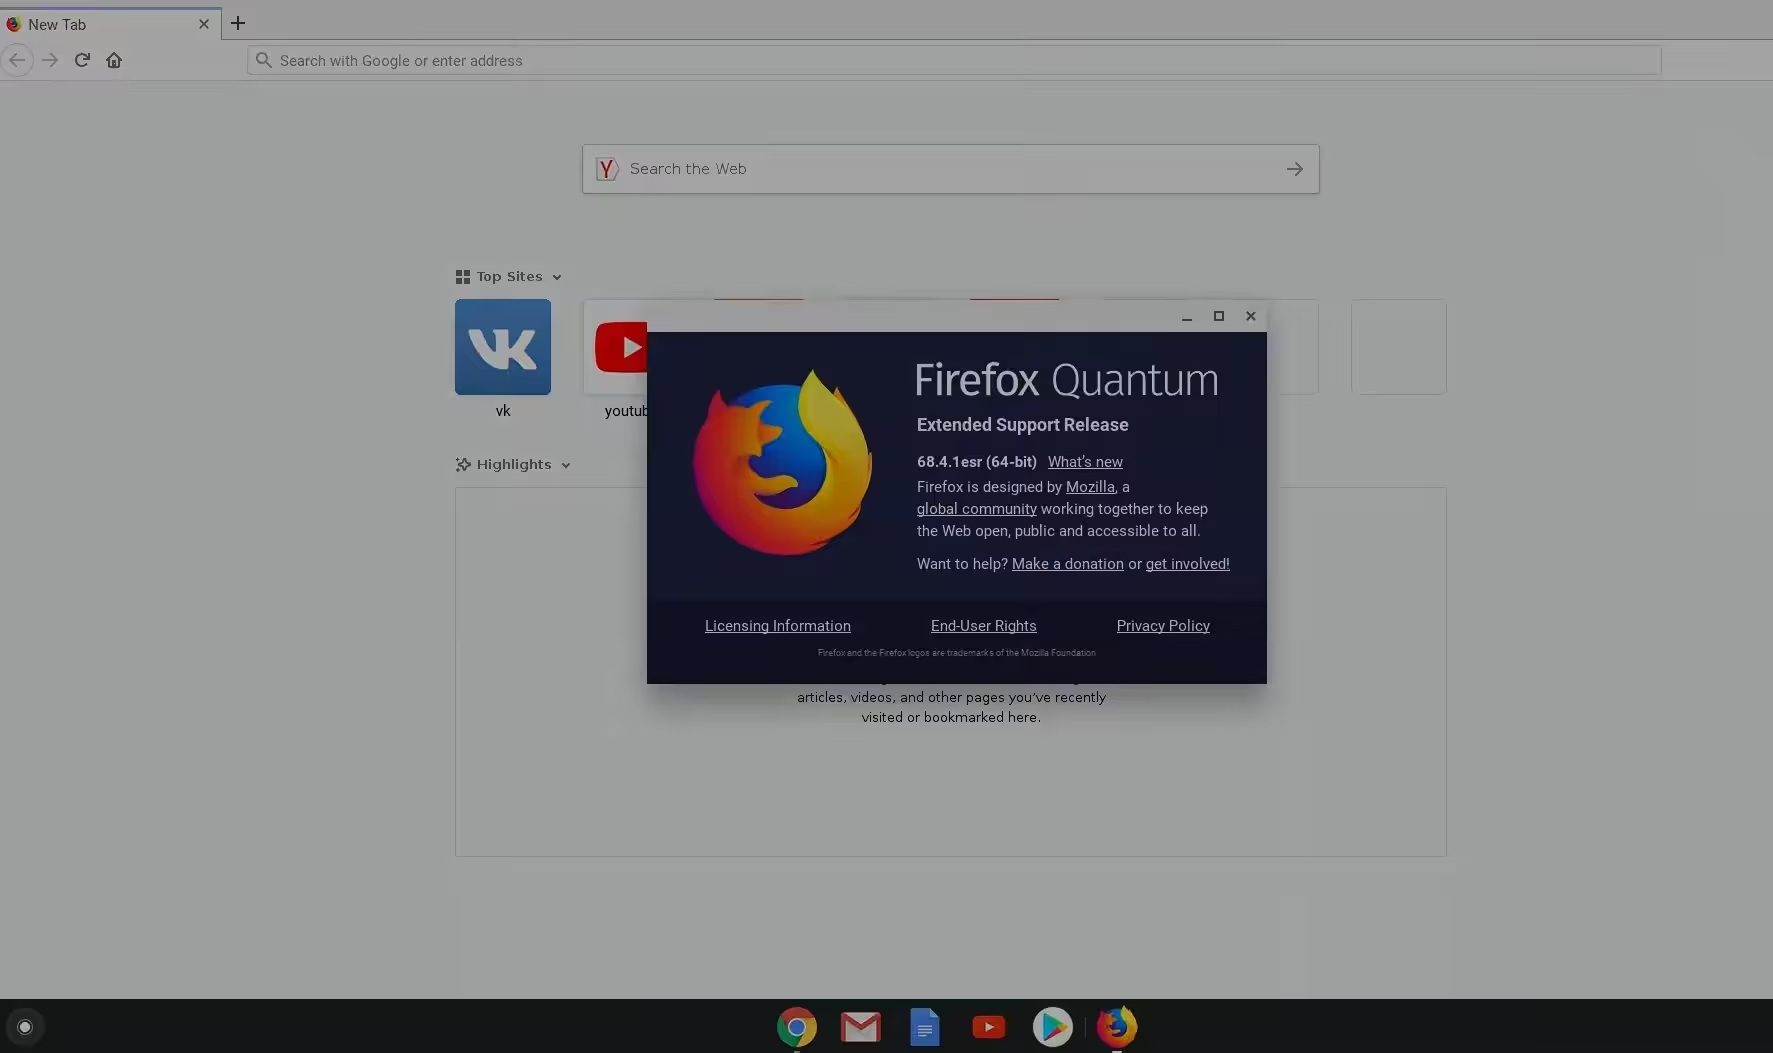
However, this Firefox is an ESR version meaning it is an Extended Support Release. It is also an official version of Firefox, mainly meant for organizations like universities and businesses, but major features available on the Standard version won’t trickle down here until a cycle is completed. The new features will be included only in the next major ESR software release. The security updates will be provided regularly, nonetheless. Hence if you want to use the new features available in the standard version, you can also install it in Chromebook through the terminal.
Related: How to use old speakers wirelessly with Google Home
Installing Firefox (Standard Version) through the Linux Terminal and Nano Editor:
As a precursor, basic dependency files of Firefox ESR versions are needed to proceed with this step. Hence follow the above method to install the Firefox ESR version first. Open Linux terminal, and it should look like a window below.

You need to remove the ESR version without deleting the basic files. To do it, type
sudo apt remove firefox-esr
Now, you need to download the Setup file of the Standard Firefox version. To do this, visit the Firefox download page to download the package and place the files where the Linux is installed. To do this, you can use the Files app to locate the Linux Directory. This will act as your Linux Folder.
Nano Editor:
Before you begin, you need to quickly install the nano editor, which you will need later. To do this, Open Linux Terminal and type:
sudo apt install nanoThis will install the editor on your computer. Now, proceed with the installation of Firefox. Follow the steps below.
- Extract this .tar file that you have downloaded to the Linux Folder. Type the following command in the terminal.
tar -xvjf firefox-75.0.tar.bz
Note: that the filename should be changed according to the latest version you have downloaded. Now, type that filename in the command above.
2. The final touch is to create an icon on the dock list. To do this, type:
sudo nano /usr/share/applications/firefox.desktop
Now, open the Nano editor we installed earlier. To open type the following in the Linux terminal:
sudo nano /etc/apt/sources.listThe editor will greet you with two lines pre-written. Paste the following commands on the editor:
[Desktop Entry]
Name=Firefox
Comment=Browse the World Wide Web
GenericName=Web Browser
X-GNOME-FullName=Firefox Web Browser
Exec=/home/USERNAME/firefox/firefox %u
Terminal=false
X-MultipleArgs=false
Type=Application
Icon=firefox-esr
Categories=Network;WebBrowser;
MimeType=text/html;text/xml;application/xhtml+xml;application/xml;application/vnd.mozilla.xul+xml;application/rss+xml;application/rdf+xml;image/gif;image/jpeg;image/png;x-scheme-handler/http;x-scheme-handler/https;
StartupWMClass=Firefox-esr
StartupNotify=true
Note: Here in the place of USERNAME in the sixth line, type your username that appears in the beginning line of the Linux Terminal window.
Related: Best Fitness / Workout apps with Google Chromecast support
Save the commands in the editor using the CTRL+O key and exit the editor. Finally, the Firefox Standard version is ready for use. This version will auto-update the browser as and when they are released. If you need to manually update, then type the following command in the terminal.
sudo apt update && sudo apt dist-upgrade
It must be noted that sometimes the Firefox icon may not appear in the dock and hence we recommend you do a Reboot after saving all the work. We hope you successfully install your version of Mozilla Firefox. Let us know how it turned out in the comments below.